Stumbled across yet another great find. I have always struggled to convert media from one format to another. There are professional paid softwares out there which can do this but none of them do everything in one. Also most of them are a big resource CPU, MEMORY, IO hog. I found this Free Software called FormatFactory and its just amazing. It will let you convert from any media file format to any one you desire. Its especially great if you have mobile devices that play certain formats or if you don't have all the codecs on your computer, this piece of software can be of great help. Check it out and post your reviews of what you think.
Format Factory Download Link
Saturday, April 3, 2010
Thursday, March 11, 2010
Download iPhone Visual Voicemail to computer
I think Lifehacker had a post about the same but for those who didn't find it, i am just posting it. You need to jaibreak your iPhone and then download iPhoneBrowser and go to the following Directory "/private/var/mobile/Library/Voicemail". Copy the .AMR files to your computer and you are all set...
Monday, February 15, 2010
MS Exchange Calendar on Thunderbird with Lightning
Finally figured out how to integrate the Microsoft Exchange Calendar with Thunderbird using the Lightning Add-on. There is no clean way to do this but whatever i am going to mention below at least works and lets you treat the Exchange Calendar as a CalDAV Server, so you can very well imagine what all you can do with it.
- Download DAVMail Gateway from this LINK. DAVMail is a sourceforge project which basically uses the OWA to get all the data you need i.e. Mail (SMTP/POP), LDAP and most important, the proprietary Calendar Data
- Install DAVMail and what it will do is basically install a server on your computer which will interact with the Exchange Server and manage creation of new events, accept events and the whole 9 yards.
- All you need to do is provide the OWA (Outlook Web Access) URL to the settings page and it will ask you for outlook Username & password.
- Here is a Link from the Wiki page on DAVMail for Step by Step guidance for Thundebird Setups.
UPDATE
Just found out a great add-on for Lightning & Thunderbird called "Exchange 2007/2010 Calendar & Tasks Provider"
The Link is below
The setup is pretty straight forward. Follow the screenshots on the page and you are all set. Just make sure that the URL you use is "https:///ews/exchange.asmx" and provide the user id and password and you are all set.
Sunday, January 24, 2010
How To Play StreamTheWorld Radio Streams on SONOS, Windows Media Player or any media Player
Guys this was a tricky one and took a lot of time to figure out. I'm on Windows 7 and use a widget call MiniRadio. Its a nice add-on where you can configure all your online streams in a playlist fashion. Almost a month ago, some of the streams which were either .wmp or .asx or .m3u stopped playing. Finally figured out that the radio stations migrated to this new "StreamTheWorld" service. This messed up everything for a lot of stations because you cannot play them on any media player because first of all, the streams are all encrypted in the Flash Player which is proprietary stuff by stream the world. So now you can't get the direct http address of the stream which you can just try in WMP or VLC or as a matter of fact any media player. Also it affects all players like SONOS who reply on the HTTP URL. So for n00bies the flash URL looks something like below..
http://player.streamtheworld.com/liveplayer.php?CALLSIGN=ARNCITY
This is for City 101.6 Fm Streaming out of Dubai..Good channel and i hated to let it go and me having to open the flash player to listen to it..
For them to play you will have to download some unique useless flash media players or directly stream from radiotime or stations website as another browser popup. It was a nuance and thought that there should be some way to find out the actual url of the stream. I tried several URL snooping, flash downloading tools but nothing worked.
Then while i was playing around with WunderRadio app on iPhone, i saw that most of these streams allowed "play in background" feature on WunderRadio. Now what that does is, it opens up the stream in Safari and its an HTML page since iPhone doesn't support Flash.. Good for us right.. yeah at-least in this scenario :-).. Now what i did was i copied the URL WunderRadio opened in Safari sent myself and email so that i can open the URL in FireFox on my Laptop.
The URL looks like this
http://wunderradio.wunderground.com/support/wunderradio/web_play.php?version=1.9&device=iPhone&skin=bluesunset&wuiId=rt:14329
This link is for Radio City 101.6 streaming out of Dubai. For other Streams, all you need to do is find the last numbers in the URL (which in my case are 96716) for your stream and do as below.
There is now an easier way to get the RT Number for the station by just using FIREFOX.
Based on Rich's comment, i went ahead and looked up the station on RADIOTIME's website
RadioTime Website
Hover your mouse over the URL of the station and below in FIREFOX you will see something like
http://radiotime.com/station/s_18760/KFH-FM_987.aspx
The number following s_ is the RT Number. Use that number and replace it in the following URL and you guys can get the URL yourself without asking me for it :-)
PS : Note to all users who have followed the steps above and the .m3u file from RadioTime's website says "Stream Not Supported". This means that StreamTheWorld or the Radio Station has blocked the access. I'll continue to find another way, till then you will have to use the flash based player for all those streams.
The new way to play the non supported streams is mentioned below
http://www.radioasiauae.com/new/radioasia/radioasia_am/user/live/Player_AM1.swf
PS : A new comment by ViRuS has given some excellent information on how to still get the PLS file when the none of the methods described above work.
Another anonymouse reader has posted about a freeware tool on source forge. Please give it a try and see if it helps.
https://sourceforge.net/projects/tidirectlink/
Happy Streaming & Listening guys..
http://player.streamtheworld.com/liveplayer.php?CALLSIGN=ARNCITY
This is for City 101.6 Fm Streaming out of Dubai..Good channel and i hated to let it go and me having to open the flash player to listen to it..
For them to play you will have to download some unique useless flash media players or directly stream from radiotime or stations website as another browser popup. It was a nuance and thought that there should be some way to find out the actual url of the stream. I tried several URL snooping, flash downloading tools but nothing worked.
Then while i was playing around with WunderRadio app on iPhone, i saw that most of these streams allowed "play in background" feature on WunderRadio. Now what that does is, it opens up the stream in Safari and its an HTML page since iPhone doesn't support Flash.. Good for us right.. yeah at-least in this scenario :-).. Now what i did was i copied the URL WunderRadio opened in Safari sent myself and email so that i can open the URL in FireFox on my Laptop.
The URL looks like this
http://wunderradio.wunderground.com/support/wunderradio/web_play.php?version=1.9&device=iPhone&skin=bluesunset&wuiId=rt:14329
This link is for Radio City 101.6 streaming out of Dubai. For other Streams, all you need to do is find the last numbers in the URL (which in my case are 96716) for your stream and do as below.
There is now an easier way to get the RT Number for the station by just using FIREFOX.
Based on Rich's comment, i went ahead and looked up the station on RADIOTIME's website
RadioTime Website
Hover your mouse over the URL of the station and below in FIREFOX you will see something like
http://radiotime.com/station/s_18760/KFH-FM_987.aspx
The number following s_ is the RT Number. Use that number and replace it in the following URL and you guys can get the URL yourself without asking me for it :-)
- Now when you open the link on firefox, you will get an alert to install missing plugin. FireFox cannot find the plugin so don't worry.
- All you do is Right Click on the page and click "View Page Info". Go to the "Media" tab and you will find and ADDRESS of type "EMBED".
- PS: Since radiotime is now owned by TuneIn, get the the stream URL from TuneIn, view page source using firefox, and search for "TuneIn.payload =". You will find "http://stream.radiotime.com/listen.stream". Copy the entire string in firefox and you will get a page with the MP3 URL. Search for "MP3","URL", and the HTTP URL next to it will be the URL you can use for streaming using your favorite media player.
- Click on the Address and below you will see the Location which you can copy.
- Copy the URL and again paste it in FireFox. It will look like this "http://wunderradio.wunderground.com/support/wunderradio/m3u/m3umaker.m3u?action=m3u&wuiId=rt:14329"
- When you open the above URL, Firefox will ask you to save the file "m3umaker.m3u". Save it on your desktop and open it in Notepad. You will see the HTTP or whatever protocol for the stream.
- For the Radio City 101.6 Streaming out of Dubai the URLs are below..
- http://208.92.52.50:80/ARNCITYAACCMP3
http://208.92.52.50:3690/ARNCITYAACCMP3
http://208.92.52.50:443/ARNCITYAACCMP3 - Now the next challenge is how to play encrypted ACC on Media Player or on Windows. These streams will play fine using iTunes but for me it was more about how to get this working with my MiniRadio gadget which is an extension of the Windows Media Player.
- Figured out that there is a plugin for Windows Media Player to play these kind of streams. Its a free plugin by a company called ORBAN which you can download here "http://www.orban.com/plugin/".
- If you can't find the plugin anymore, download it from my rapidshare link below
- ORBAN RapidShare Link
- Download the essential codec pack from "http://www.free-codecs.com/K_lite_codec_pack_download.htm" followed by the ORBAN plugin and you will be able to play the AAC and AAC PLUS streams directly in Windows Media Player..
- Now For Windows Media Player to play the AAC & AAC+ streams using the Orban Plugin, you will need to change the protocol from HTTP to ICYX.. So for the HTTP URLs above, the Windows Media Player link would be something like this "icyx://208.92.52.50:80/ARNCITYAACCMP3"
PS : Note to all users who have followed the steps above and the .m3u file from RadioTime's website says "Stream Not Supported". This means that StreamTheWorld or the Radio Station has blocked the access. I'll continue to find another way, till then you will have to use the flash based player for all those streams.
The new way to play the non supported streams is mentioned below
- Download the K-Lite Mega Codec Pack from the following link "K-Lite Mega Codec Pack"
- This codec will install a FLV/SWF/Flash Player plugin for the Windows Media Player.
- Now Go to the Radio Time Website and find the radio station you want to listen to
- Click on the LISTEN link. You can also go the the station website and do the same.
- Make sure you are doing this in FIREFOX.
- Also make sure you have No-SCRIPT plugin installed and is set to block flash streams
- Now when you click on the LISTEN link, a new window pops up with blocked SWF/FLV player.
- Right Click on the FLASH/SWF blocked link and click "Copy Link Location". This will copy the swf/flv/flash URL
- No go to Windows Media player of your favourite Windows 7, Windows Vista Gadget and press CTRL+U to play a URL and paste the URL. The Stream will play seamlessly without any issues. You can try the same for all other streams as well.
http://www.radioasiauae.com/new/radioasia/radioasia_am/user/live/Player_AM1.swf
PS : A new comment by ViRuS has given some excellent information on how to still get the PLS file when the none of the methods described above work.
- Get the Call Sign for the Stream. For City 101.6 Fm Dubai, its ARNCITY.
- Use the following URL http://provisioning.streamtheworld.com/pls/ and replace the call sign after pls/. So the final URl will look like http://provisioning.streamtheworld.com/pls/ARNCITY.pls.
- Open it in Firefox and it will ask you to download the ARNCITY.pls to your computer.
- Download the file and open it in notepad and you will have the actual stream URLs. use anyone in windows media player or any media player and you are all set..
Another anonymouse reader has posted about a freeware tool on source forge. Please give it a try and see if it helps.
https://sourceforge.net/projects/tidirectlink/
Happy Streaming & Listening guys..
Tuesday, December 8, 2009
Copy & Backup SMS, Address Book, Contacts from iPhone, iPod Touch To Your Computer !!!!
As always, struggled through this one too. Just couldn't figure out how to get all the data from iPhone to my PC and manage it or save it on my PC in case. After all the research and googling i found out that all this important information on iPhone or iPod Touch is stored as a SQLITE Database. So i found out where all these files were, got a SQLite Database Viewer and there you have it, your own data backup tool. Below are the steps for anyone who needs step by step details.
- Get iPhonebrowser from google code projects. Link is here iPhonebrowser
- You will have to Jailbreak your phone so user blackra1n
- This works on a non-jailbroken iPhone as well.
- If iPhonebrowser doesn't detect your phone as jailbroken, try the AFC2 fix mentioned here
- Download SQLite Database Viewer from Sourceforge Link
- Now connect your Jailbroken iPhone or iPod Touch to your Windows PC.
- Start iPhonebrowser and navigate to /var/mobile/Library directory.
- For SMS Database go to the SMS folder and copy sms.db to your PC
- For Address Book or your Contacts, go to AddressBook directory and copy AddressBook.sqlitedb to your PC
- Now open SQLite Database Viewer and open the sms.db file. Click on Browse Data Tab and change the Table Name to message. You will see all your messages in a tabular format.
- Select all the rows using Shift key and your mouse and click FILE > EXPORT > Table as CSV.
- This will save all the data in the table to a CSV file which you can open in XL.
- Similarly open the AddressBook.sqlitedb. This file is a little complicated and will require a little bit of SQL knowledge. All you need to do is write a SQL query to join ABMultiValue and ABPerson tables. A sample query is given below which you can execute on the EXECUTE SQL Tab and similarly Export the Data which the query returns. "select * from ABMultiValue"
- The other option is export the data from ABMultiValue and ABPerson tables as csv and open in XL and using XL macros generate a consolidated file for all your contacts.
Monday, October 19, 2009
Solution - "AVG firewall cannot start because an error has occurred in communication with a driver"
For those who use AVG Antivirus and have recently upgraded from 8.5 to 9.0, some of you might be seeing errors with the AVG Firewall. The Error would say the following "AVG firewall cannot start because an error has occurred in communication with a driver".
AVG is a great antivirus, anti spyware, firewall etc all in one. Its light weight and not as cumbersome as some of its competitors like Symantec and Mcfee etc. The above error only occurs if you have upgraded from 8.5 and you have kept the user settings and firewall profiles. Version 9.0 has only 3 seeded Firewall Profiles "Directly Connected To Internet", "Computer In Domain" and "Small home or office network". Previous version 8.5 had a couple more like "Standalone Computer" etc. I had the same problem. Every time i uninstalled, i kept the user settings and with the new version i restored the old profiles and settings. When i did a clean uninstall of 8.5 and ran the free utility from AVG website "avgremover.exe", it cleaned up all my previous settings. After that i did a clean install of 9.0 and let it select the best possible profile in the wizard mode.
I have not had the problem since then.. Hopefully this will be helpful for others who have the same problem..
Thursday, October 15, 2009
Getting rid of EISA OEM Partitions from Most Laptops (Lenovo, Toshiba, DELL, HP etc)
I guess my blog is all about sharing the stuff which i have struggled through and finally found solutions or fixes. This is another one. Recently upgraded a Lenovo laptop from VISTA to WINDOWS 7. Like any other OEM, this one came with a 13 GB partition which was pretty much useless after my upgrade and was using up valuable Laptop Hard Drive capacity. Had a terrible experience with my Toshiba when i upgraded to Windows 7 and had my Boot Sectors royally screwed (which is going to be another post), so didn't wanna take any chances with this one. Firs of all the Lenovo 3000 Y410 came with this QuickKey Recover which was using this EISA (OEM) partition. Also since this hidden partition was a part of the primary partition any playing around would have messed up the Boot Loader. After enough googling i couldn't find a decent post which would outline the process correctly. So i tried something after being absolutely sure that it will work. Below are the details.
- Windows 7 (and even Vista) comes with this neat utility to make this Repair Disk. Just go to the System Options in control Panel and buy a CD and create a REPAIR DISK as the first step. This is just in case there is some problem after the changes are made to the primary EISA OEM partition.
- Now you can either use the standard DISKPART utility provided by Microsoft or use what i did, ACRONIS DISK DIRECTOR SUITE.
- Using DISKPART, make sure that the Partition and Volume is marked ACTIVE always since its the primary partition. If you mess this up, you will get "Missing Operating System" error every time you start your computer and nothing will be able to restore your computer. The only thing that will work is the Original Windows 7 CD with Command Prompt option and using DISKPART on it to make partition and volumes active.
- Using Acronis Disk Director or DISKPART, select the EISA OEM partition and Format it to NTFS with Automatic sector size of 4KB. The partition will be formatted and Windows 7 will take 31MB which cannot be merged or extended to any other partition. You will find posts on google telling you to DELETE the partition first and then FORMAT. Don't do that. Just FORMAT will work followed by a RESIZE.
- Now using Acronis or DISKPART, resize the partition (C or D) on your drive to reclaim the space from this freed up partition. If using Acronis, don't forget to COMMIT. This will ask you to restart your computer and let ACRONIS do its job.
Friday, September 11, 2009
AT&T Windows Mobile Phones & Internet Connection Sharing (Working on BlackJack II)
With Windows Mobile 6.1 and even with WinMo 6, Internet Connection Sharing using a mobile phone and 3G network, surfing the internet where ever there is a cell phone connection, couldn't be easier. The carriers how ever try to bind you to there data plans for tethering etc but atleast for AT&T, below is the process to use the 3G connection on your computer. I am mentioning two different ways below. One uses the seeded Microsoft Internet Connection Sharing application and the other one uses the phone as a modem for dialup and uses the 3G connection without using your anytime minutes etc. I have tried both the option on my BlackJack II without issues. So this approach works on any phone which has Internet Connection Sharing app or you can find the Modem Drivers for your Phone.
Internet Connection Sharing
Internet Connection Sharing
- Download the CeRegEditor from http://ceregeditor.mdsoft.pl/
- Connect your phone to your computer in ActiveSync mode and Unlock the Registry using the tool mentioned above. I have another post on this blog on how to use the tool.
- Now navigate to HKEY_LOCAL_MACHINE\Comm\InternetSharing\settings and make it NULL. If CeRegEditor doesn't take a null, enter one blank space and it will automatically take it as NULL value.
- You can do the same thing using Resco Registry Editor on the phone if it will let you do it without giving you permission issues or without reverting it back to what it was. In my case it was set to "AT&T ISP" for which you need to signup for an additional tethering plan with AT&T.. What a rip off.. i must say..
- Next you have to unlock the GPRS profiles already setup on your phone by the carrier.
- Search my blog for "UAPMgr" and you will find any article on how to unlock the GPRS Profiles.
- Once Unlocked modify the "MEdia Net" & "AT&T ISP" settings by making the access point as "wap.congular", user name as "WAP@CINGULARGPRS.COM" and password as "CINGULAR1".
- Reboot the phone.
- Once the above steps are done, make sure that the USB Connection Settings are set to ACTIVESYNC and not MODEM or MASS STORAGE.
- You might have to restart the phone and then again connect to your computer.
- Once the ActiveSync partnership is setup, open the "Internet Connection Sharing" application on the Phone.
- Select the "PC Connection" as "USB" and "Network Connection" as "MEdia Net" and press the Connect Button on the left soft key. You will see that the computer basically sets up a new dialup kind of network connection and automatically connect to the internet.
- Just open up a browser and make sure your proxy settings are correct and you will be able to connect to the internet without any issues.
- Follow steps 5, 6 & 7 as above to setup the GPRS profiles correctly.
- Download the Modem Drivers for your phone and setup the Phone USB Connection Settings as "MODEM" and not "ACTIVESYNC" or "MASS STORAGE". When you change this to modem, you might get a warning about activesync will not work, but you can ignore that as long as you don't wanna sync your phone while you access internet on your computer.
- Now connect your phone to the computer and you will see that your computer will try to install the modem drivers for your phone. instead of wasting time and having Microsoft find the best driver, point it to the downloaded drivers and let it setup your Phone as a Modem.
- Now go to your network settings and create a New Dial Up connection with the following options
- Phone number to dial is *99#, User Name & Password for AT&T are the same as mentioned in step 7 above.
- Make sure that the Dial Up Connection is setup to use your Phone Modem and not the Internal PC modem if you have one.
- Now press DIAL and you will see a window showing the status of the connection like "Registering On The Network". Once connected, the dial-up networking will minimize to your system tray and you are now connected to the internet and can use your browser and other applications to connect to the internet.
Saturday, July 18, 2009
Utility To Get Instant GPS Coverage on Mobile Phone (Windows Mobile)
Well i found this utility "GPSTest.exe" on the Samsung Blackjack II and it makes all your GPS applications like Google Maps, Windows Live Search or Bing, Garmin Mobile XT, to instantly get a connection with the GPS satellites. So no more waiting while you are driving to get a signal. All you do is start this application on windows mobile device and do a Menu > Start and this utility will find the GPS Satellites, Lat/Long and couple other parameters. All this utility does is activate the GPS Receiver in the phone, instead of the application doing it and waiting. Now i get a GPS signal in less than 5 seconds on Google Maps, Bing or Garmin.
The Utility is under Windows folder and is called "GPSTest.exe". You can make a shortcut in your Start Menu so that its easily accessible. Once you do a Menu > Start, it will activate the GPS Receiver and once it finds the satellite, you can do Menu > Stop and start the applications you want.
To Actually improve the speed, you can also play with the Menu > Options > GPS settings and set the "Operating Type" to "Stand-alone". It worked on my Samsung Blackjack II. Try playing with other options "MS Based" or "Assisted"
Monday, July 13, 2009
Oracle 11i Applications Working on IE8, Firefox 3.5 & VISTA and Windows 7
This one is a biggie..It took me forever to fix this one and so many hit and trials that at one point i just gave up and used a remote desktop connection to a XP machine with IE6 and Firefox. What you need to do is below and please follow the exact steps for this to work. I got this to work on latest Firefox 3.5 and IE8 and that too on VISTA. It also works on the current Windows 7 RTM both Firefox and IE8. When you upgrade to Windows 7 from VISTA using the upgrade process, it migrates all programs etc so it worked for me on Windows 7 as well, no issues.
Jinitiator - http://rapidshare.com/files/278241098/oajinit.exe

- Install JInitiator version "1.3.1.21". I can give provide the executable if needed.
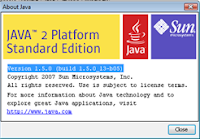
- Make sure that your Java Version is "1.5.0 (build 1.5.0_13-b05)". I have not tried the latest version. I can probably provide the oajse2.exe.
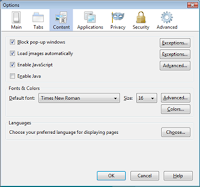
- In Firefox change the following Settings (Uncheck Enable Java)
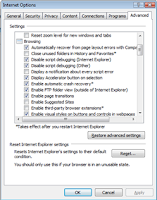
- In IE8 Tools -> Options -> Advanced -> "Enable third-party browser extensions" (UNCHECK)
- Replace the JVM.DLL in "JInitiator 1.3.1.21\bin\hotspot" directory with the JVM.DLL in "Java\jre1.5.0_13\bin\client".
- Restart both Firefox and IE8.
- The 11i Apps work via the regular login as well as "dev60cgi/f60cgi" URL.
- I have uploaded both Java JRE and Jinitiator on Rapidshare. Below are the links
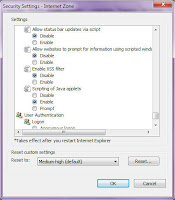
- One more thing to note. I was also able to work with both 11.5.10 and 12.1.1 with IE8. All you need is to install the latest oajse and make sure that under Security options, change the mode to CUSTOM and DISABLE "Enable XSS Filter" option.
Jinitiator - http://rapidshare.com/files/278241098/oajinit.exe


Saturday, July 11, 2009
TCPMP Media Player Windows Media Audio Plugin For Smartphones & PDAs
For all those who installed the recompiled version of TCPMP on Windows Mobile 6.1 for both Smartphone and PDA may encounter an error while playing videos or just audio in the WMA format. I am posting the link below for the WMA decoder which just needs to be placed under the windows directory on the phone and TCPMP restarted.
Special thanks to a post on XDA by krishan2207.
WMA Plugin for TCPMP Media Player
Special thanks to a post on XDA by krishan2207.
WMA Plugin for TCPMP Media Player
Yahoo Mail IMAP/POP3 & Hotmail/Live Mail IMAP/POP3 Working Setup on PDA
For those who are interested in getting there emails on there PDA or even Thunderbird, below is the hack.. Yahoo will still not allow Thunderbird or Exchange to use these settings sometimes.. maybe they have a way of identifying whether a request came in from a PC or a PDA/Smartphone but it works flawlessly (esp on smartphone/pda)
Yahoo IMAP Server Setup on Smartphone/PDA (Windows Mobile 6.0 & Windows Mobile 6.1)
The setup is similar to above and you need to make sure that the Domain Name in starting email address is something other than "HOTMAIL.COM" to start with and you can change it later once the setups are complete otherwise Windows Mobile will never let you setup the account. Below are the incoming POP3 and outgoing smtp server settings for Hotmail. They should also work for Live mail.
Yahoo IMAP Server Setup on Smartphone/PDA (Windows Mobile 6.0 & Windows Mobile 6.1)
- Go to "Messaging" on your phone and click Setup Email.
- Type in your mail id but make sure that the domain name for now is something other than yahoo.com. We will come back later and change it. If you type in your yahoo user id and @yahoo.com, system will automatically try to find the setup which you don't want so just type in something like @yaho.com and select INTERNET EMAIL.
- Enter your name and the account name.
- Incoming mail server - imap.mail.yahoo.com and select type as IMAP4
- Enter your user id as complete "abc@yahoo.com" and this time use the correct domain as YAHOO.COM.
- Enter and Save your password
- Outgoing mail server - smtp.mobile.mail.yahoo.com and select both "outgoing server requires auth" and "use the same name and password for sending email"
- In the Advanced setting make sure that SSL settings are UNCHECKED.
- Select the Send/Receive schedule and the message format & download settings according to your liking and click Finish.
- Now you will see Yahoo Account in the list of your mail accounts. Go into TOOLS -> OPTIONS -> ACCOUNT SETTINGS -> EDIT ACCOUNT SETUPS to change the email address with the correct domain i.e. yahoo.com and click next till you see Finish.
- There you have it, Yahoo Mail setup successfully on your Smartphone or PDA.
- You can try the same incoming & outgoing servers on Thunderbird or Outlook and see if it will work. Sometimes it does and sometimes it doesn't but it works flawlessly on the handheld device.
The setup is similar to above and you need to make sure that the Domain Name in starting email address is something other than "HOTMAIL.COM" to start with and you can change it later once the setups are complete otherwise Windows Mobile will never let you setup the account. Below are the incoming POP3 and outgoing smtp server settings for Hotmail. They should also work for Live mail.
- Incoming mail server - pop3.live.com and select type as POP3
- Outgoing mail server - smtp.live.com and select both "outgoing server requires auth" and "use the same name and password for sending email"
- In the Advanced setting make sure that SSL settings are CHECKED.
- There you have it, Windows Hotmail or LiveMail setup successfully on your Smartphone or PDA.
- These settings work flawlessly on the PC as well using Thunderbird o
Wednesday, July 1, 2009
Lifehacker... An awsome website for the geeks n Tech Savy ppl...
Just wanted to share that LifeHacker is just an awesome website for a lot of new cool tech stuff..
Lifehacker RSS Feed
Lifehacker RSS Feed
Sunday, June 14, 2009
Thunderbird / Firefox Profile Migration From One Computer To Another
One of the best things about Mozilla projects is that they ensure smooth, hassle free migration of all your data from one computer to another. Its as simple as copying over the entire profile directory to the new computer's profile directory. You have to do it once for XP and Twice for Vista.
XP Instructions
XP Instructions
- Go to the /Document & Settings/User Id
/ Application Data/Mozilla/Firefox/Profiles - There will be a weird looking folder under profile. Copy all the contents and paste them in the new weird looking folder in the new machine (same path) and restart FIREFOX.
- Similarly for Thunderbird, make sure your local file storage and the folder structure for your mail accounts match in both the old and the new machine. Copy over all the mbox and msf files to the same folder structure on the new machine.
- Now go to /Document & Settings/User Id
/ Application Data/Thunderbird/Profiles - There will be a weird looking folder under profile. Copy all the contents and paste them in the new weird looking folder in the new machine (same path) and restart Thunderbird.
- Sometimes Thunderbird may or may not pickup the Mbox and MSF files. Just make sure tha you go to your account settings and check the "Local Directory" under the "Server Settings" and make sure it points to the correct folder.
- Exactly the same way as above, except for the fact that you have to copy the contents to two different places for both FireFox and Thunderbird.
- FireFox folder paths are /Users/
User Id/AppData/Local/Mozilla/Firefox/Profiles and /Users/User Id/AppData/Roaming/Mozilla/Firefox/Profiles - Thunderbird folder paths are /Users/User Id
/AppData/Thunderbird/Firefox/Profiles and /Users/User Id/AppData/Roaming/ Thunderbird/Profiles.
Thursday, April 30, 2009
BSNL Broadband Account Management Portal..
I have seen a lot of people struggle with the correct portal address to manage the broadband usage and manage passwords. Below is the link. Use your "Portal ID" which is different from the Broadband Usage ID. The password is the same as the password for your Broadband access which you got at the time of Signup.
BSNL - Boradband Account Management
Update:
The new portal for BSNL Data Management is below
BSNL Portal
BSNL - Boradband Account Management
Update:
The new portal for BSNL Data Management is below
BSNL Portal
Saturday, April 25, 2009
How to delete Exchange Server (Outlook Mail) account on Windows Mobile
If you have created an Outlook Mail account on a windows mobile device and for whatever reason its not working for you and you just want to get rid of it, MS doesn't provide a clean way of deleting the account via the "Manage Accounts" in the email setup. Below is the convoluted way of doing it and MS might think its correct because according to them, a mail account of type Exchange Server is meant for ActiveSync only..
- Go to Active Sync settings on your phone.
- Click on Menu > Options.
- You will See "Exchange Server" account alongwith the "Windows PC" account listed with the folders which are being synced.
- Just navigate to the "Exchange Server" account and again click Menu > Delete.
- It will ask you for conformation that it will delete all the sync data. Click YES and there you have it. The non working Exchange Server Account is gone from your list of valid accounts.
Saturday, April 18, 2009
Adding sitemap to Google Webmaster Tools for non standard websites (OfficeLive)
Well this is another oen of those good finds.. if you have an OfficeLive Website and haven't been able to regsiter yoru website on Google Webmaster, try my post below. Once your website is verified, the next step is to add the SiteMap to Google Webmaster. I am mentioning the Trick below.
Documents%5Csitemap.xml
DON'T put www before your domain and remember to change last "/" to "%5C"
- Using Office Live Site Designer creates a new page using "Site Map" template. Such as mysitemap.aspx.
- Go to http://www.xml-sitemaps.com/ , enter the url without www, Such as http://mydomain.com/mysitemap.aspx and Download un-compressed XML Sitemap.
- Save the file sitemap.xml. You can rename it as you want. Upload the sitemap.xml to Documents Gallery on OfficeLive.
- Add the sitemap xml file on Search Engine.
DON'T put www before your domain and remember to change last "/" to "%5C"
Friday, April 17, 2009
Google Webmaster Site verification for ASP, ASPX, XHTML websites (MS Office Live Websites)
I had tough time verifying my Microsoft OfficeLive Websites on Google Webmaster Tools because standards say that the main page should be an HTML. Well guess what MS uses ASP and ASPX and other providers user XHTML etc. Below is the trick to allow Google Webmaster Site verification for atleast MS OfficeLive Websites.
If it doesn't work, view your page, make sure there is no code showing at the top. Also right click on the page, view source, and look at the meta tags (near the top).
meta name="verify-v1" content="rCLLGGTVdEiGe+DXLHKLCD670B8f 99LfK/Ax6s="
- Sign Up for Google Webmaster tools.
- Add your site and choose the meta validation method.
- Copy the Google meta verification code into notepad or any text editor. meta name="verify-v1" content="YOUR CODE"
- Copy the code below into into the same notepad or text editor. %22%20%2F%3E%3Cmeta name=%22verify-v1%22 content=%22YOUR CODE
- Simply replace the ID in the code with your id from the code from Google. If your ID contains "+", replace the + with %2B. %22%20%2F%3E%3Cmeta name=%22verify-v1%22 content=%22rCLLGGTVdEiGe+DXLHKLCD670B8f99LfK/Ax6s=
- Copy the finished code, and to your home page (default.aspx), open page properties, and paste the code into the keywords text box after any keywords! Make sure the whole code is pasted, since the keyword box has a character limit and if you have to many keywords and some or all of the code might not get pasted in, shouldn't have to worry, if you do, you might want to go over the list of keywords since you really shouldn't have that many.
- Go back to Google Webmaster tools and verify.
If it doesn't work, view your page, make sure there is no code showing at the top. Also right click on the page, view source, and look at the meta tags (near the top).
meta name="verify-v1" content="rCLLGGTVdEiGe+DXLHKLCD670B8f 99LfK/Ax6s="
Best Lo-Fi, Ambient, World, Lounge, Chillout music mp3 Downloads
I stumbled upon this website who has good collection of Lounge / Chillout music and releases latest albums pretty quickly.. and no its not torrents.. its instant download of full length albums.. So if you like Lo-Fi, Ambient, World, Lounge, Chillout music.. its the best place to get it.. The website is in Russian so just use the Google Translator.. The Albumart actually tells you about the album.. Have Fun !!!
Best Lo-Fi, Ambient, World, Lounge, Chillout music mp3 Downloads
Best Lo-Fi, Ambient, World, Lounge, Chillout music mp3 Downloads
Thursday, March 19, 2009
Access Internet on iPod Touch via WiFi using your computer/laptop
Life is much better after the drawback of not having 3G in ipod touch is gone. If you can have your computer/Laptop connect to LAN or WiFI using Boingo or iPass or even 3G on your other Windows Mobile :-) phone, you can use that same connection on iPod Touch. So if you need your Weather App or Stocks app or any APP that uses the internet, to update automatically, you need to read what i have in store for you.. Microsoft working for Apple is how i would put it.. XP or Vista you can setup the Ad-Hoc WiFi network on your computer/laptop and share it with your existing Internet connection and there you have it.. a fully wireless internet on iPod Touch. I will post the detailed instructions below hopefully by tommorow..
So here you go..
1. Create an AD-HOC Wireless network on your laptop by going to Control Panel > Network Connections > Wireless Network Connections > Properties > Wireless Networks Tab. Click On ADD, give a SSID, check "Connect Even if this network is not broadcasting", make the network authentication "Open" and you can make Data Encryption as "Disabled" or WEP. I have not had great success with WEP or WPA. Check the "This is a computer-to-computer (ad hoc) network" and save it.
2. Now go to the LAN Adapter and click properties. Click on "Advanced" Tab and under "Internet Connection Sharing" check "Allow other network users to connect through this computer's Internet connection" checkbox. Select the "Wireless Network Connection" from the drop down and click OK.
3. Now try and connect to the ad-hoc wireless network created on your laptop from your laptop. It will try to connect but then just say not-connected.
4. Go to your iPod Touch > Settings > Wireless. Wait for couple and you will see your ad hoc network. Connect and let it use DHCP
There you have it, full internet connectivity on your iPod touch via the LAN network..
Subscribe to:
Posts (Atom)